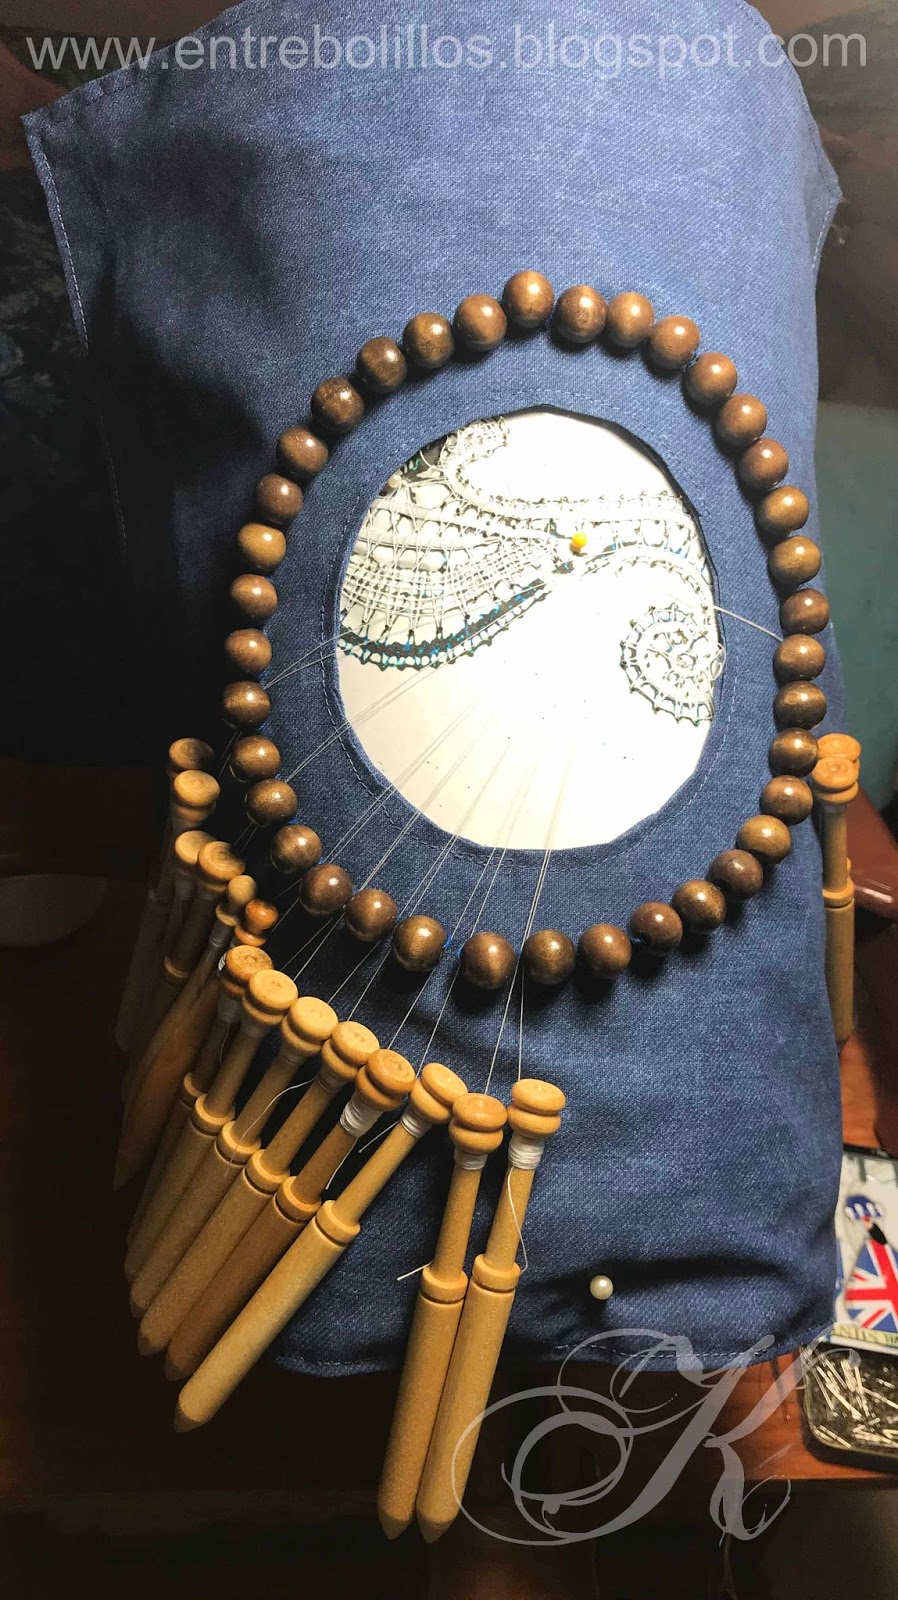
Creo que FINALMENTE luego de varios intentos y modificaciones he logrado conseguir un separador que bolillos que también funge como protector de labor y ayuda a levantar un poco el hilo de los bolillos para que no se enganche en los alfileres. Lo he probado y resulta muy cómodo.
I have FINALLY come up with a bobbin lifter/spacer/cover all-in-one thing after several tries. This is a piece of fabric - which covers and protects the work in progress - with large beads sewn in circle - which separates the pairs and lift the threads up and off the lace in progress avoiding snags.
I've tried it and I'm very happy with the results.


A continuación algunas instrucciones para confeccionar este protector.
Bobbin lace lifter/spacer/cover picture tutorial.

1 - Cortar dos piezas de tela del tamaño deseado, marcar la circunferencia del orificio al centro y cortar dejando media pulgada de espacio.
Cut 2 pieces of fabric of the desired size, draw the circumference for the center orifice and cut leaving 1/2 inch.

2 - Cortar pestañas a todo alrededor del orificio en ambas piezas.
Snip the fabric all around the orifice in both pieces.

3 - Planchar y sujetar las pestañas en su lugar; hilvanar.
Press and pin the snipped fabric in place; baste them.


4 - Hilvanar ambas piezas juntas con el derecho hacia afuera.
Baste both pieces, wrong sides together.

5 - Encuadrar las piezas y cortar cualquier exceso.
Square both pieces and trim excess fabric.

6 - Planchar los bordes de la tela 1/2 pulgada hacia adentro.
Press 1/2 inch of fabric to make the edge.

7 - Con aguja e hilo, dar un par de puntadas para sujetar las esquinas, por el revés.
Use needle and thread to fix the corners with a couple stitches.


8 - Sujetar ambas piezas con alfileres y coser alrededor para cerrar.
Pin and sew both pieces closed.

9 - Marcar una circunferencia a 1 pulgada del borde del orificio
Draw a circle 1 inch from the orifice's edge.


10 - Con aguja e hilo (grueso), coser las cuentas alrededor del orificio. ¡Listo!
Sew the beads all around the orifice with needle and thick thread. Voilá!

great idea! did you make it yourself? is there a source to buy or directions on how to make it? TIA.
ReplyDeleteLinda :)
Thanks! I came up with it after some trial and error! It's two pieces of fabric sewn together (to avoid snagging threads on the underside) and large beads hand sewn around the opening. The opening is 3 inches in diameter and the beads are sewn 1 inch away from the edge of the opening.
Deletewould you mind if I shared with my Lace Guild? If you do I understand. TIA.
ReplyDeleteLinda
Of course! Share away :) feel free to ask any questions :)
DeleteGracias! !! Genial! Es ideal.
ReplyDeleteGracias! !! Genial! Es ideal.
ReplyDelete